Cách reset, khôi phục cài đặt gốc cho Macbook
Trong bài viết dưới đây, Bitly.vn sẽ Hướng dẫn cách reset, khôi phục cài đặt gốc cho Macbook Air, Pro về cài đặt ban đầu chi tiết mới 09/2024. Bài viết này áp dụng được cho cả Macbook phiên bản Air và Pro luôn nhé!
Khi nào cần phải Reset MacBook
Vì sao bạn phải khôi phục lại cài đặt gốc cho Macbook của mình. Khi gặp phải những vấn đề sau đây:
- Vấn đề tương thích: Khi nâng cấp lên hệ điều hành mới, bạn có thể gặp phải tình huống các ứng dụng quen thuộc không còn hoạt động ổn định hoặc thậm chí không thể sử dụng được.
- Muốn trải nghiệm hệ điều hành mới: Nếu bạn tò mò muốn khám phá các tính năng mới của hệ điều hành mới hơn nhưng lại muốn quay trở lại phiên bản cũ, khôi phục cài đặt gốc là giải pháp hiệu quả.
- Xung đột phần mềm: Các phần mềm trên máy có thể xung đột với nhau, gây ra lỗi hệ thống, khiến máy hoạt động chậm chạp hoặc thậm chí bị treo.
- Tối ưu hóa hiệu năng: Việc tích lũy quá nhiều ứng dụng và dữ liệu không cần thiết sẽ làm giảm đáng kể tốc độ hoạt động của MacBook. Khôi phục cài đặt gốc sẽ giúp bạn xóa bỏ mọi thứ và bắt đầu lại từ đầu, giúp máy chạy mượt mà hơn.
- Cải thiện tốc độ: Nếu bạn cảm thấy máy tính của mình hoạt động chậm chạp, việc khôi phục cài đặt gốc có thể giúp cải thiện đáng kể tốc độ xử lý.
Những lưu ý trước khi reset MacBook
Sao lưu dữ liệu trước khi reset MacBook
Khôi phục cài đặt gốc sẽ làm mất tất cả dữ liệu có trên máy của bạn như ảnh, video, nhạc, tin nhắn,… Do đó, bạn nên sao lưu lại các dữ liệu quan trọng để có thể sử dụng sau khi cài đặt lại máy.
- Time Machine: Đây là công cụ sao lưu tích hợp của macOS, giúp bạn sao lưu toàn bộ dữ liệu của máy vào một ổ cứng ngoài.
- iCloud: Bạn có thể sử dụng iCloud để sao lưu các dữ liệu quan trọng như hình ảnh, tài liệu, và các tập tin khác lên đám mây.
Đăng xuất khỏi iTunes
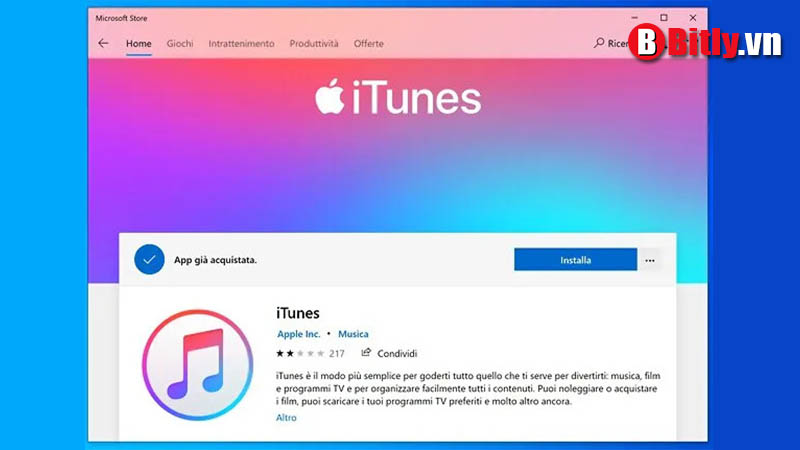
Việc đăng xuất iTunes sẽ giúp bạn tránh bị khóa tài khoản.
Để đăng xuất iTunes, bạn thực hiện như sau:
- Bước 1: Mở iTunes trên MacBook.
- Bước 2: Trên thanh menu, bạn chọn Account (Tài khoản) -> Chọn Authorizations (Uỷ quyền) -> Chọn Deauthorize This Computer (Hủy cấp phép Máy tính Này).
- Bước 3: Hệ thống sẽ yêu cầu bạn nhập Apple ID và mật khẩu. Sau khi nhập xong, bạn nhấn Deauthorize để hoàn tất việc đăng xuất iTunes.
Đăng xuất khỏi iCloud trước khi reset MacBook
Với máy sử dụng phiên bản macOS Catalina hoặc phiên bản mới hơn, đăng xuất iCloud để ngắt kết nối giữa máy Mac và các dịch vụ khác của Apple:
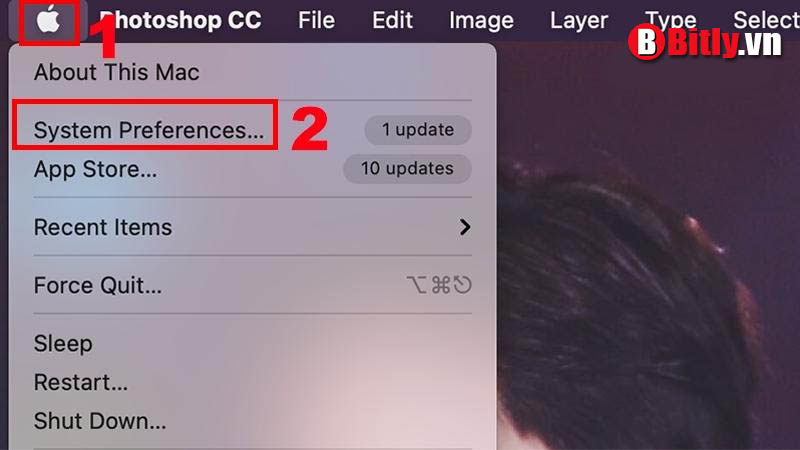
- Bước 1: Nhấn vào biểu tượng Apple ở góc trái màn hình -> Chọn System Preferences (Tùy chọn Hệ thống).
- Bước 2: Chọn Apple ID (ID Apple).

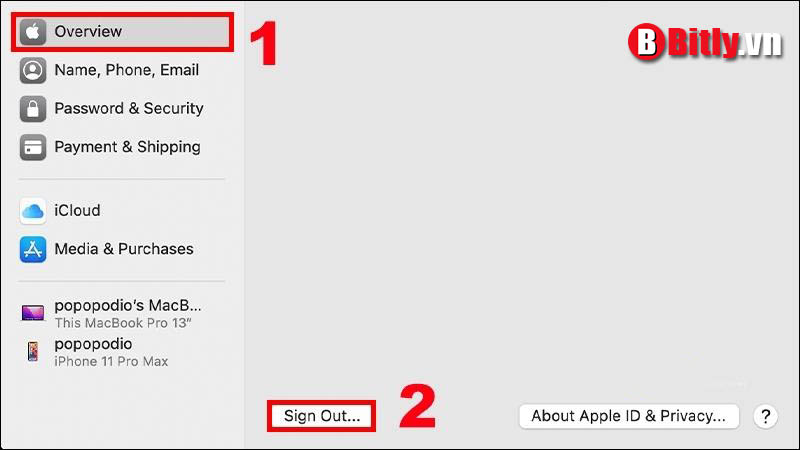
- Bước 3: Chọn Overview (Tổng quan) -> Nhấn vào Sign Out (Đăng xuất).
Sau đó, bạn sẽ được hỏi liệu có muốn giữ lại bản sao dữ liệu iCloud của mình trên máy Mac này hay không. Bạn có thể nhấn Keep a Copy (Giữ lại Bản sao) vì bạn sẽ cài đặt lại máy Mac của mình sau này. Dữ liệu trên iCloud vẫn còn trên bất kỳ thiết bị nào mà bạn đã đăng nhập vào iCloud bằng Apple ID của bạn.
Đường truyền không ổn định sẽ làm việc khôi phục diễn ra lâu hơn và có thể bị lỗi trong quá trình cài đặt. Vì thế, bạn nên kiểm tra kết nối WiFi trước khi reset máy.
Đảm bảo nguồn điện cho laptop
Cắm sạc cho MacBook trong suốt quá trình reset để tránh tình trạng máy bị tắt đột ngột.
Tắt tính năng Secure Boot (chip Apple T2)
Tính năng này giúp bảo mật máy Mac, tuy nhiên, nó có thể gây trở ngại cho quá trình reset. Vì vậy, bạn nên tắt tính năng này trước khi tiến hành.
Hướng dẫn cách tắt tính năng Secure Boot:
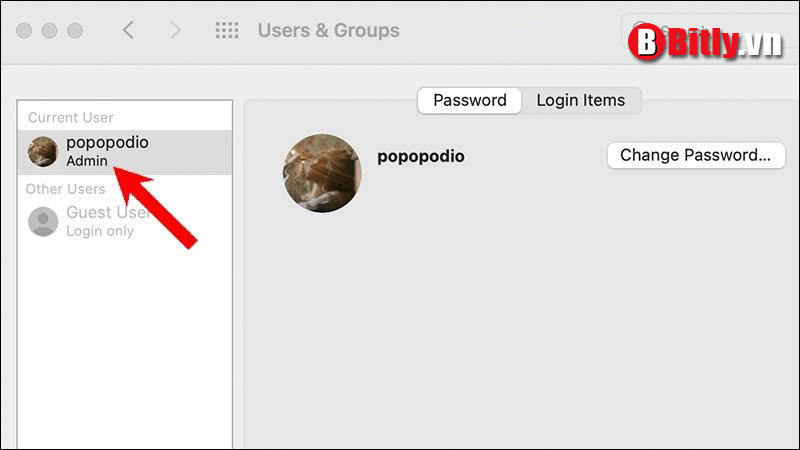
- Bước 1: Kiểm tra chắc chắn máy phải đang có sẵn hệ điều hành trên ổ cứng với ít nhất một người dùng (User) có quyền quản trị viên (Administrator). Bạn có thể kiểm tra bằng cách vào System Preferences -> Users & Groups.
- Bước 2: Bạn tiến hành Shutdown máy và khởi động vào Recovery bằng cách nhấn phím nguồn rồi ấn giữ tổ hợp phím Command + R.
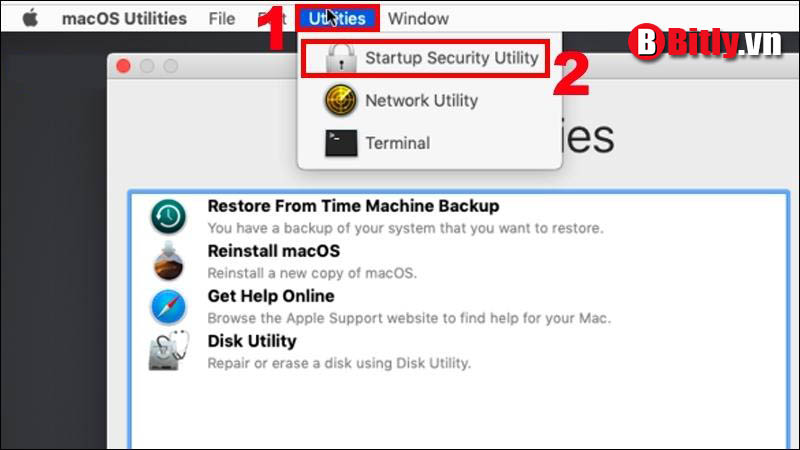
- Bước 3: Tại đây, bạn chọn Utilities -> Startup Security Utility.
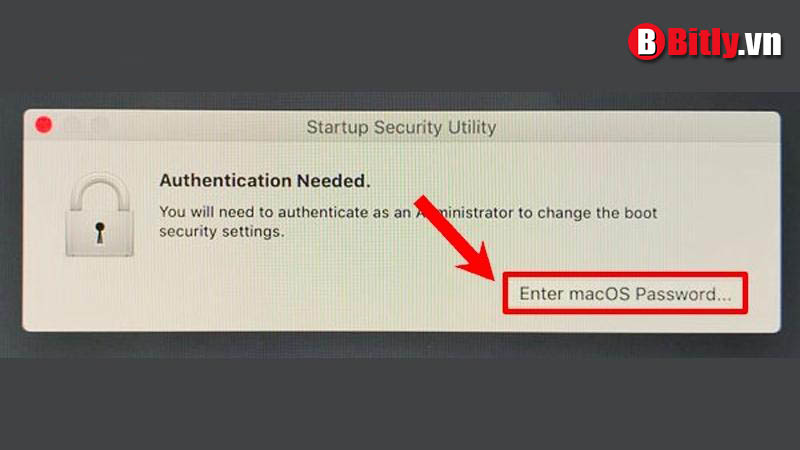
- Bước 4: Lúc này, hộp thoại Startup Security Utility sẽ hiện ra, bạn chọn Enter macOS Password rồi nhập mật khẩu của tài khoản Admin.
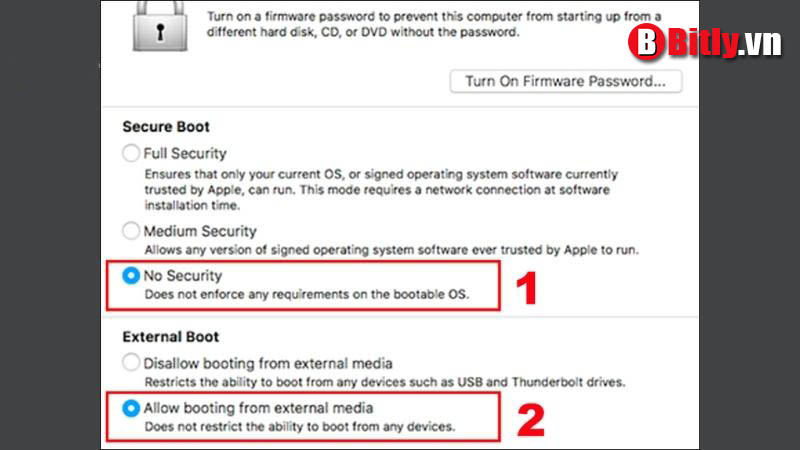
- Bước 5: Tại màn hình Startup Security Utility, bạn chọn No Security ở mục Secure Boot Stick và chọn Allow booting from external media ở mục External Boot.
Cuối cùng, bạn nhấn vào logo Apple ở góc tay phải chọn Shutdown (hoặc Restart) để lưu lại là hoàn tất.
Cách reset MacBook đơn giản và chi tiết
Sau khi đã hoàn tất các bước chuẩn bị (sao lưu dữ liệu, đăng xuất tài khoản, kiểm tra kết nối mạng, đảm bảo nguồn điện và tắt Secure Boot nếu cần), bạn có thể tiến hành reset MacBook theo các bước sau:
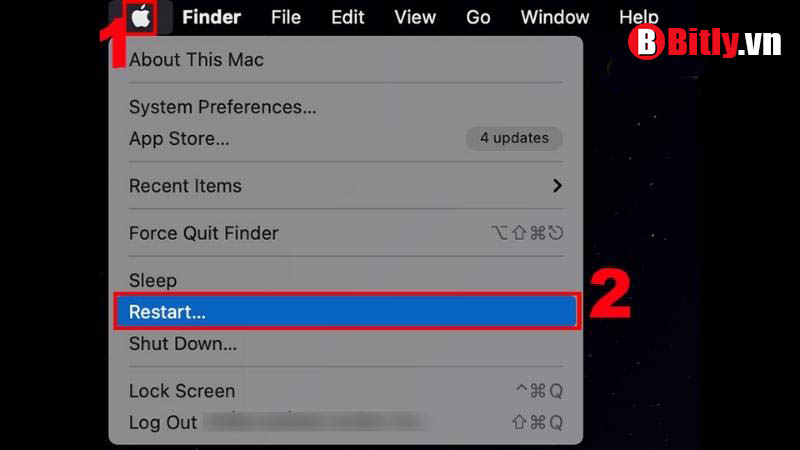
Bước 1: Khởi động lại máy tính
Đầu tiên, bạn nhấn vào biểu tượng Apple ở góc trái màn hình -> Chọn Restart (Khởi động lại).
Bước 2: Sử dụng tổ hợp phím
Sau khi MacBook khởi động lại, bạn hãy nhấn và giữ một trong những tổ hợp phím sau tùy vào tác vụ mà bạn muốn thực hiện cho đến khi đến khi thấy logo Apple xuất hiện, bao gồm:
- Cài đặt phiên bản mới nhất của macOS tương thích với máy tính: Ấn tổ hợp phím Option + Command + R.
Nghĩa là nếu MacBook đang chạy hệ điều hành macOS Catalina 10.15.1 và bạn bấm tổ hợp phím trên, thì sau khi cài đặt lại, hệ điều hành lúc này sẽ là phiên bản cao nhất Apple hỗ trợ cho máy của bạn. Chẳng hạn như macOS Catalina 10.15.2 hoặc macOS Catalina 10.15.3,…

- Cài đặt lại phiên bản macOS mà bạn đang sử dụng trên máy Mac của mình: Ấn tổ hợp phím Command + r.
Nghĩa là nếu MacBook của bạn đang chạy hệ điều hành macOS Catalina 10.15.1 và bạn bấm tổ hợp phím trên, thì sau khi khôi phục cài đặt gốc xong, hệ điều hành trên máy vẫn là macOS Catalina 10.15.1.

Bước 3: Xóa dữ liệu trên ổ cứng
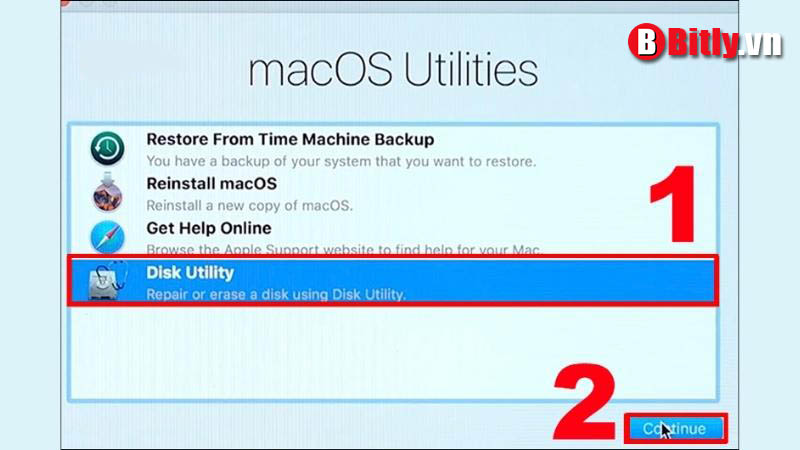
Sau khi nhấn phím xong, một cửa sổ macOS Utilities sẽ xuất hiện. Để khôi phục cài đặt gốc, đồng thời đưa MacBook trở về trạng thái như vừa mới mua, bạn nhấn vào tùy chọn Disk Utility -> Chọn Continue (Tiếp tục).
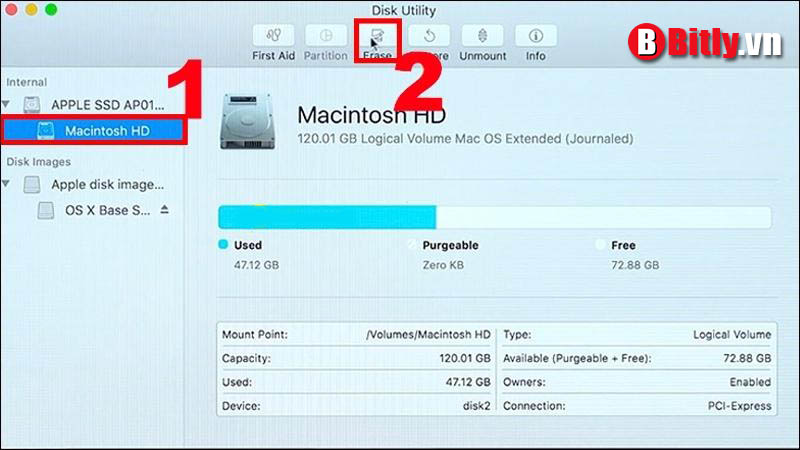
Tiếp theo, bạn chọn Macintosh HD -> Chọn mục Erase (Xoá).
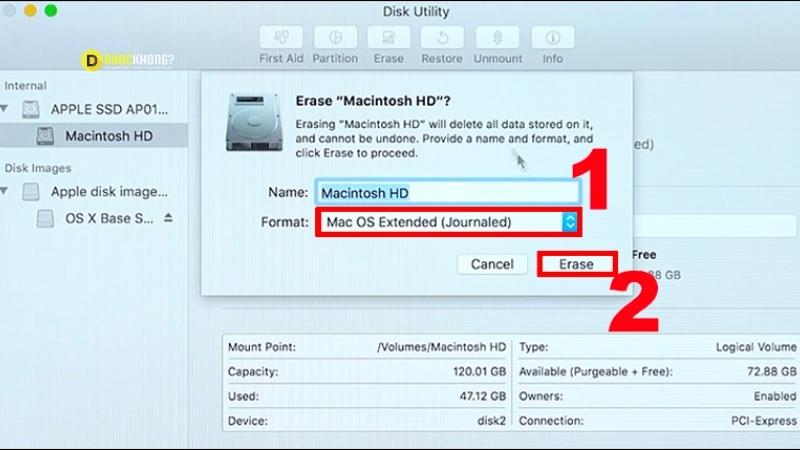
Sau đó, hệ thống sẽ hiện một mục nhằm xác nhận bạn có muốn xóa Macintosh HD hay không. Tại bước này, nên chắc rằng format được chọn là Mac OS Extended (Journaled). Bạn kiểm tra lại format và chọn Erase (Xoá).
Bước 4: Cài đặt lại macOS
Sau khi xóa xong, bạn thoát khỏi Disk Utility, lúc này hệ thống sẽ đưa bạn trở về cửa sổ macOS Utilities.
- Bạn nhấn vào Reinstall macOS -> Chọn Continue (Tiếp tục).

- Tiếp đến, bạn làm theo hướng dẫn để cài đặt hệ điều hành cho máy Mac. Nếu bạn vẫn tiếp tục sử dụng máy này thì sau khi khôi phục xong, bạn tiến hành đặt lại các thông tin như lúc mới mua máy là được.
- Trong trường hợp bạn quyết định khôi phục máy để sang nhượng hay bán cho người khác thì sau khi reset máy xong, bạn có thể nhấn tổ hợp phím Command + Q để tắt máy.
Cách Set Up lại sau khi reset MacBook
Sau khi reset MacBook, bạn sẽ cần thực hiện một số bước để thiết lập lại máy. Dưới đây là hướng dẫn chi tiết:
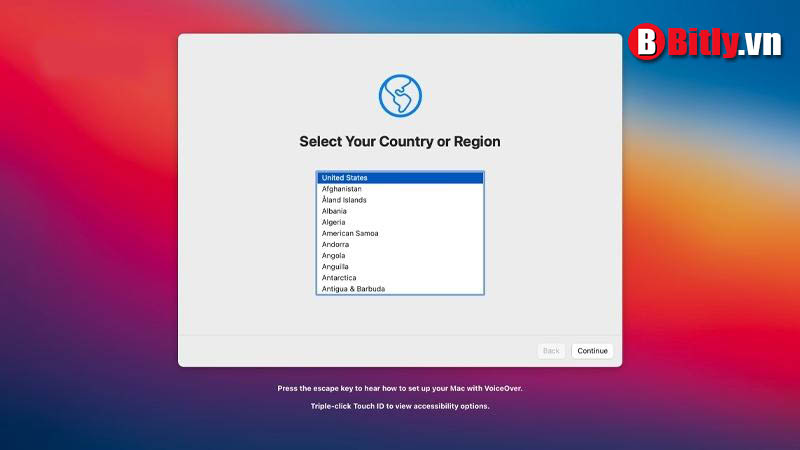
Chọn vùng sau khi reset MacBook
- Chọn quốc gia: Máy sẽ yêu cầu bạn chọn quốc gia. Bạn có thể thay đổi sau này trong System Preferences > Language & Region.
- Chọn bàn phím: Nếu chọn Việt Nam, bạn sẽ có tùy chọn chọn bàn phím ABC hoặc Tiếng Việt.
Chọn keyboard Layout
Nếu bạn chọn vùng là Việt Nam, MacBook sẽ đề xuất ABC và Tiếng Việt làm bàn phím tiêu chuẩn. Bạn chỉ cần click Tiếp tục là máy sẽ được tích hợp hai ngôn ngữ là Tiếng Anh và Tiếng Việt (bộ gõ Telex).
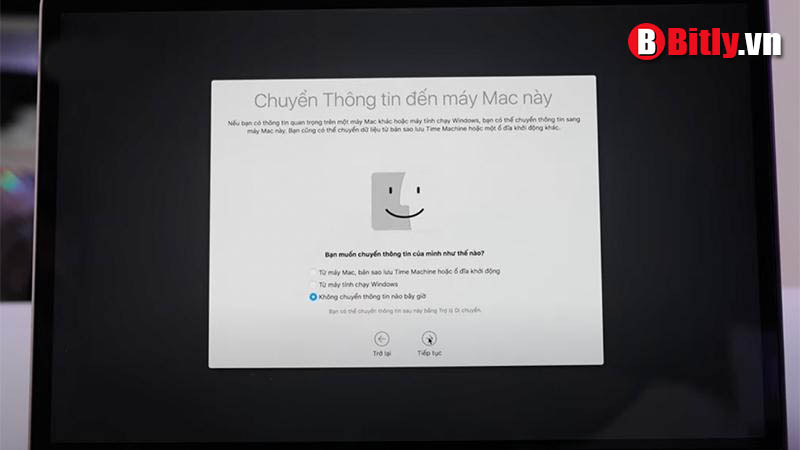
Phục hồi dữ liệu từ Time Machine
Kết nối ổ cứng Time Machine vào MacBook. Làm theo hướng dẫn trên màn hình để khôi phục dữ liệu từ bản sao lưu.
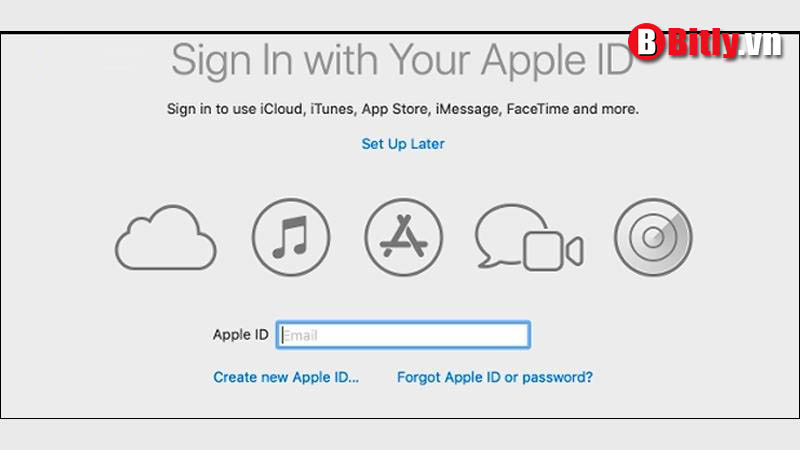
Đăng nhập Apple ID
Nhập thông tin Apple ID của bạn để đồng bộ hóa dữ liệu iCloud, App Store và các dịch vụ khác của Apple. Nếu không muốn đăng nhập ngay, bạn có thể chọn Thiết lập sau.
Đặt tên và mật khẩu cho MacBook
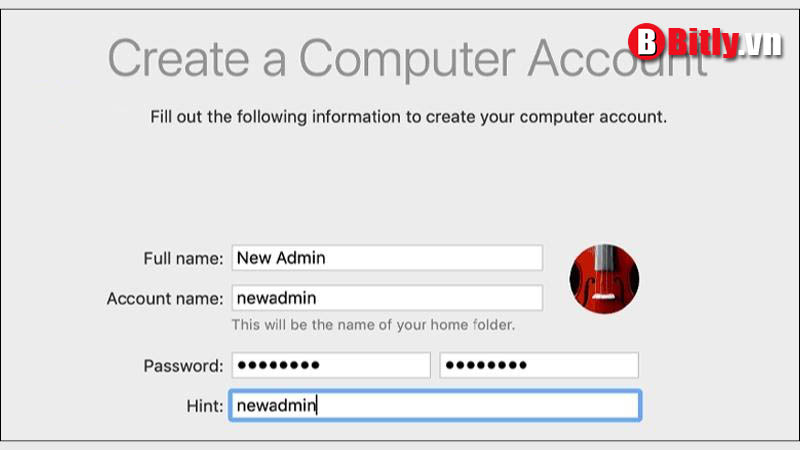
Nhập tên bạn muốn đặt cho MacBook và tạo một mật khẩu mạnh để bảo vệ máy. Bạn hoàn toàn có thể sử dụng lại mật khẩu cũ trước đó
Tùy chọn FileVault
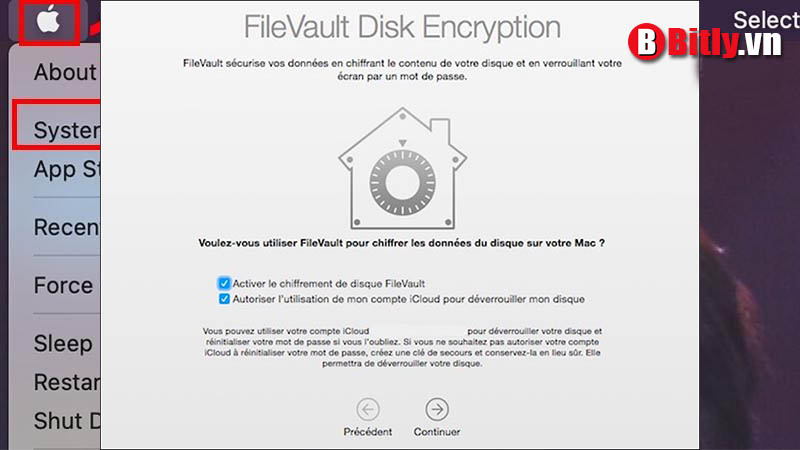
Đây là tính năng mã hóa ổ đĩa. Bạn có thể bật tính năng này để tăng cường bảo mật dữ liệu. Tuy nhiên, việc bật FileVault sẽ làm giảm tốc độ máy.
Kết luận
Chúng tôi vừa cung cấp thông tin và các bước cần thiết để reset MacBook một cách đơn giản và hiệu quả. Nếu có bất kỳ câu hỏi nào, đừng ngần ngại để lại bình luận bên dưới, chúng mình sẽ giải đáp ngay nhé. Ngoài ra, bạn có thể tham khảo thêm nhiều bài viết hữu ích khác trên Bitly.vn. Hãy like và theo dõi chúng mình để không bỏ lỡ bất kỳ thông tin bổ ích nào!”